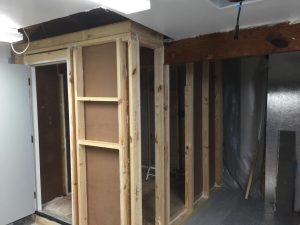
Introduction
How do you build cold storage? If you work in the food industry, you know that proper storage is crucial to maintain the quality and safety of your products. A cold room storage is a specialized storage facility that keeps perishable goods at low temperatures to prevent spoilage and extend their shelf life. Building a cold room storage is not a simple task, but with the right knowledge and tools, you can create a functional and efficient space that meets your specific needs.

Step-by-Step Guide to Building a Cold Room Storage
Step 1: Determine Your Requirements
Before you start building your cold room storage, you need to determine your specific requirements. Think about the type and quantity of products you will store, the temperature range needed, and the space available. This will help you determine the size of your cold room storage, the type of insulation required, and the cooling system that best suits your needs.
Step 2: Choose the Right Location
The location of your cold room storage is critical to its performance. You want to place it in an area that is well-ventilated and away from sources of heat, such as direct sunlight, ovens, or heaters. The room should be located near a power source and have easy access for loading and unloading products.
Step 3: Install Insulation
Insulation is essential to keep your cold room storage at the desired temperature. Choose high-quality insulation material that is durable and efficient, such as polyurethane foam or expanded polystyrene. Install the insulation on the walls, floor, and ceiling of the room, making sure there are no gaps or leaks that could compromise the temperature.
Step 4: Install a Cooling System
A reliable cooling system is essential to keep your cold room storage at the desired temperature. There are different types of cooling systems available, including split systems, self-contained systems, and remote systems. Choose the one that best suits your needs and budget. Make sure to hire a professional refrigeration technician to install the cooling system and ensure it operates efficiently and safely.
Step 5: Install Shelving and Racks
Once the insulation and cooling system are installed, you can start adding shelves and racks to store your products. Choose durable and easy-to-clean materials, such as stainless steel or plastic. Make sure the shelves and racks are spaced evenly to allow proper air circulation and prevent condensation.
Step 6: Install Lighting
Lighting is important to ensure proper visibility and safety in your cold room storage. Choose lighting fixtures that are waterproof and have a high IP rating to prevent any moisture from damaging the electrical components. Install the lighting fixtures in areas where they do not interfere with the cooling system or shelving.
Step 7: Test and Monitor the Temperature
Once your cold room storage is fully installed, it’s important to test and monitor the temperature regularly. Use a thermometer to check the temperature at different points in the room, and make sure it stays within the desired range. Consider installing a temperature monitoring system that alerts you if the temperature goes above or below the set range.

Conclusion
Building a cold room storage is a complex process that requires careful planning and attention to detail. By following these steps, you can create a functional and efficient space that meets your specific needs. Remember to choose high-quality materials, hire professional technicians, and monitor the temperature regularly to ensure the safety and quality of your products. click here for more information

Recent Comments